Using Home Assistant to fix a Litter Robot
If your LR4 refuses to cycle because of sensor faults, maybe HA can automate the pain away


I've loved my Litter Robot for the years that I've had it. It's saved a ton of time and messiness with maintaining a litter box. But, it developed an issue over time where the weight sensor wouldn't recognize when my cat was gone. It could detect my cat entering the machine just fine but, whenever the scale stayed triggered, it'd refuse to cycle and eventually tell my phone that it was stuck. Presumably, as a safety measure, the app won't cycle the machine manually when a sensor has a fault, either. So I was stuck powering the LR off and back on to get it to cycle.
Mercifully, the Home Assistant integration for Whisker devices solved my problem.
Setup
This tutorial assumes you already have a working HA instance and can follow the instructions here for adding your LR4 to HA. I didn't encounter any problems during the integration setup when following the instructions.
Automation
Once your LR4 is wired into HA, navigate to the LR4 device in the HA web interface. eg: Settings > Devices & Services > Litter-Robot > Device
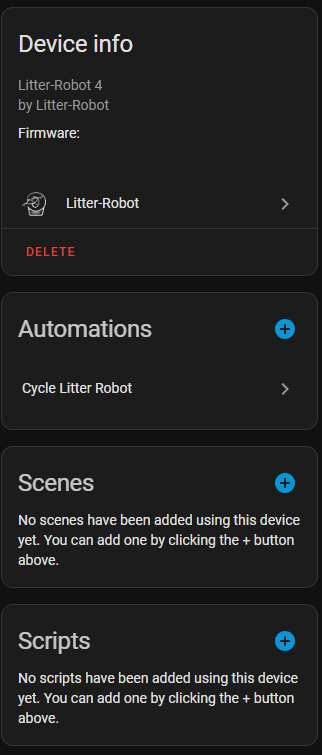
Normally, I do my automations in Node-RED but I felt like keeping this one simple and building it with the native HA tools. So click the "+" button within the "Automations" section. Choose "Create new automation" to use the blank template.
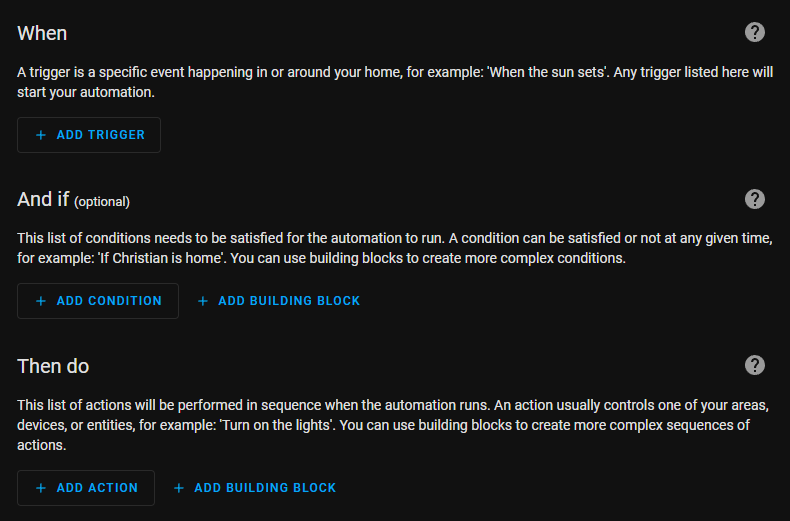
In case you've never used HA automations before, the builder here is pretty intuitive. You define conditions (what things should start the automation) at the top. Then any extra filters in the "And if" section (we won't be using these). And, finally, the actions you want performed in the "Then do" section.
Triggers
Let's start by defining all of our triggers. There are five conditions I've found that need to be handled for my weight sensor fault. If you have a different issue, your combination of triggers may be slightly different.
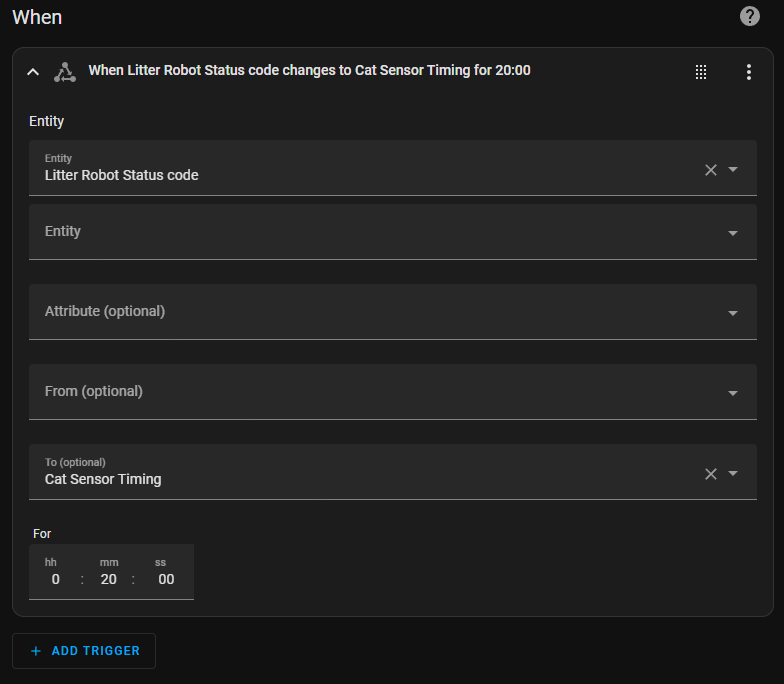
Click the "+ Add Trigger" button under the "When" section. Click "Entity" and "State" to add the trigger template.
Type "Litter Robot status code" into the "Entity" field. If you named your LR4 differently in HA, it may show up under "{whatever you named it} status code".
Select "Cat Sensor Timing" in the "To" field.
Then set the "For" field to however long you want this automation to wait before triggering. In my case, I use 20 minutes to allow for the times when the LR4 cycles on its own or if my cat is taking his sweet time. If the robot enters a status that isn't in our trigger list, the timer gets cleared. So the machine won't accidentally cycle if, for instance, my cat gets back into the litter box before the 20 minute timer is up. It'll instead queue a new automation instance the next time he leaves the litter box.
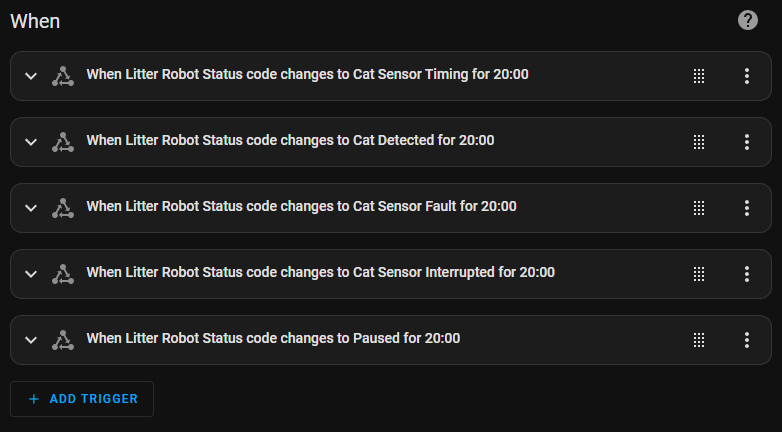
Repeat that process four more times, using these values as the "To" field:
- Cat Detected
- Cat Sensor Fault
- Cat Sensor Interrupted
- Paused
Again, if your sensor fault is different, you may need different triggers. Since the "To" field is a dropdown, it shows all the possible values. You can browse through and try different combinations to match your situation.
Actions
When I was doing this manually, I had to power the LR4 off and on from the Whisker mobile app. The integration in HA doesn't have the option to do that, currently, and I thought I was hosed. But, it turns out that telling the LR4 to "stop" and "start" a few times is enough to do the same job.
The quirky thing here is that "stop cleaning" and "start cleaning" aren't actions of the Litter Robot integration itself. Instead, HA sees the LR4 as a robotic vacuum that it can order to start and stop, as if it had a scheduled cleaning routine.
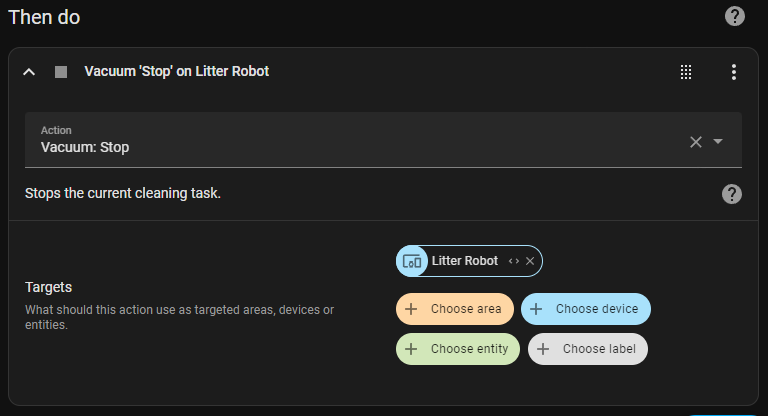
So, let's click "+ Add Action" in the "Then do" section.
Scroll down to "Vaccum" and click it.
Scroll down to "Stop" and click that.
Now, you just have a generic "start doing robot vacuum stuff" action. We have to pick a target for it to do anything. Click "+ Choose device" next to "Targets" and select your LR4.
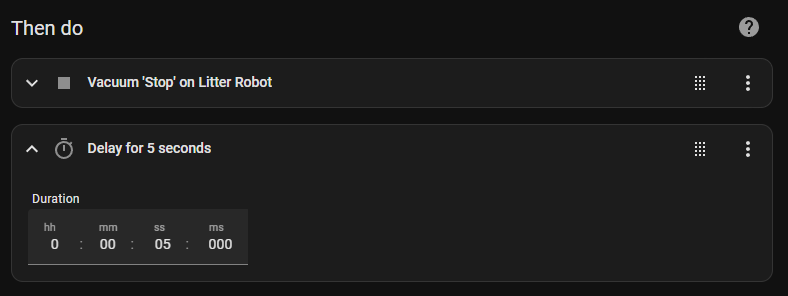
I found that issuing "Start" immediately after "Stop" did nothing. Instead, let's add a delay first.
Add another action and search for "Delay". I have it set to 5 seconds.
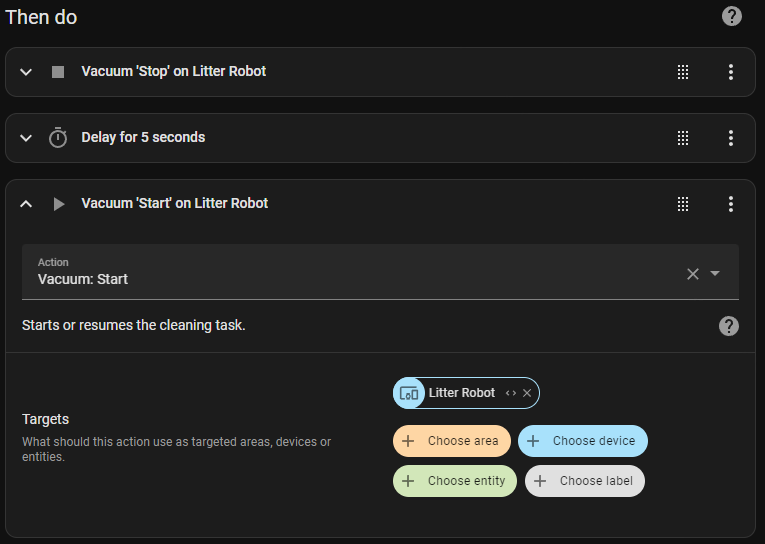
Next, repeat the steps for the "Stop" command but choose "Start" instead.
Testing
That's most of the magic. You can click "Save" and try it out. If you wave your hand in front of the LR4 laser sensors or wait for your cat to use the litter box, you should see it cycle 20 minutes later.
If it doesn't work, you can troubleshoot the automation by going back into the automation we made and clicking the "Traces" button at the top of the window. It'll show a graph of the triggers and actions and clicking each node will show logs of the last execution.
Making it a bit more robust
But, I'll help you out a bit, too. I wrapped my actions in a loop that repeats the actions until it knows the LR4 started cycling like it should.
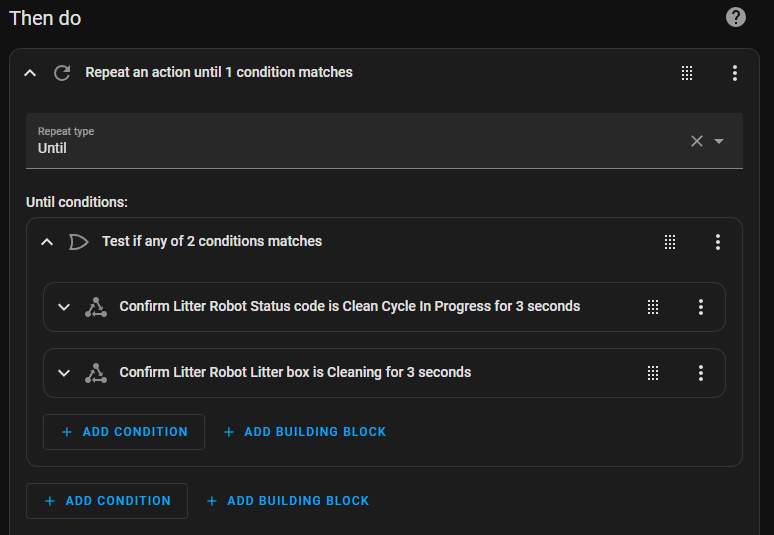
Click "+ Add Building Block" under the "Then do" section of our automation. These aren't actions on their own; instead, they're logical blocks that let us do things like loop through actions or run multiple steps at once.
Click "Repeat".
Set the "Repeat type" to "Until".
Click "+ Add Building Block" inside the "Repeat", under the "Until conditions" section.
Select "Or".
Repeat our triggers from above but let's pick the good statuses, now.
- Clean Cycle In Progress
- Cleaning
I set each to 3 seconds, this time.
Now, we can click+drag the little dot grid beside each of our actions to drag them into the "Actions:" section of our loop.
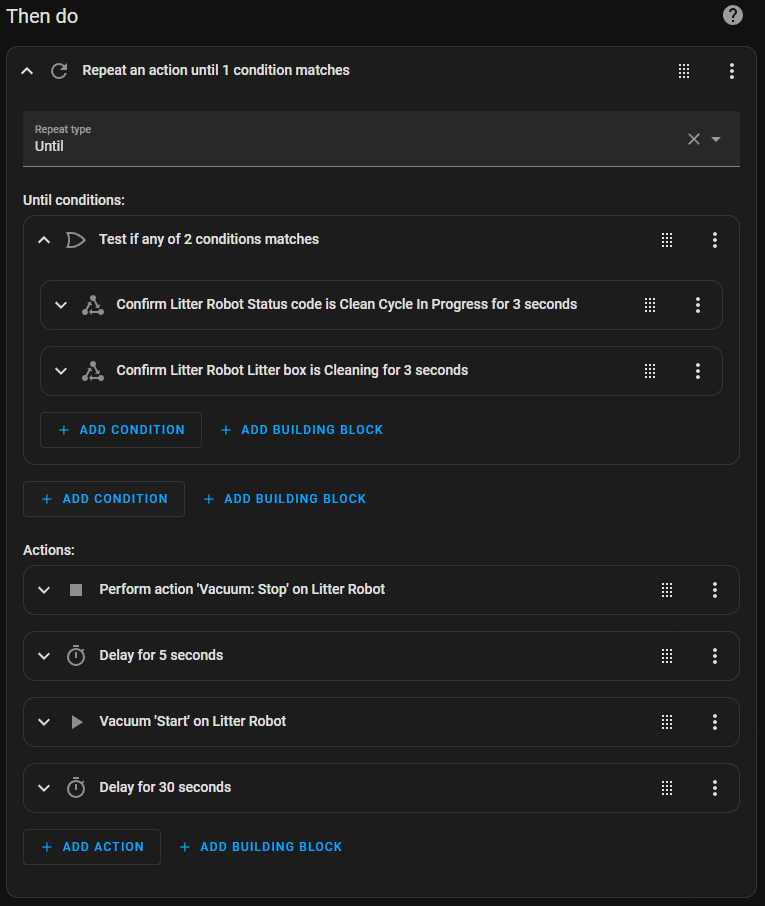
I also added a 30 second delay at the end of the loop to give the LR4 time to fix itself, if it was having a moment. Be sure to hit "Save" again, between tests.
What this final actions block does is:
- Stop the LR4
- Wait 5 seconds
- Start the LR4
- Wait 30 seconds
- Check if it's cycling
- If it is, exit the loop and finish
- If not, try issuing the commands again
Final Thoughts
I've had great success with this automation. Just for peace of mind, I also added actions that text my phone (via the mobile HA app integration) whenever the automation is starting, going through the loop, and finishing. After seeing that it worked flawlessly for a few weeks, I removed the text notifications and went back to the bliss of a fully automatic litter box once again.