Publishing .NET NuGet packages using GitHub Actions
At the end of this guide, you'll have a private NuGet package, hosted for free on GitHub, created automatically whenever a private repository's master branch changes, and easily imported into another project through Visual Studio's NuGet GUI.

At the end of this guide, you'll have a private NuGet package, hosted for free on GitHub, created automatically whenever a private repository's master branch changes, and easily imported into another project through Visual Studio's NuGet GUI.
This guide is specifically written for .NET 5. Given all the rapid changes between the last release of .NET Framework, .NET Core, and (now) .NET, a lot of details have changed from the guides people have written in the past. They may change for future versions of .NET, as well.
Contents
- Motivation
- Setting up the library project
- Creating the GitHub Actions workflow
- Referencing the NuGet package in another project
- Updating the package
# Motivation
We have some .NET 5 library projects (DLLs) at my job that are included in most of our client applications. For a while, we were just copying the .dll files from the build folders into each application, which was simple, but it came with a lot of baggage (no versioning, tedious updates, scales poorly). I investigated hosting NuGet packages off our corporate NAS, which is supposedly supported, but ran into some issues with automating it.
Now, we've used GitHub actions to automate packing and publishing the NuGet packages under our GitHub organization's Packages. The source repositories and their output packages are both kept private. We can easily include the packages in our client applications with only a minor extra step for authentication.
# Setting up the library project
Our first step will be to get the project that we want to be a NuGet package ready. For the sake of this guide, we'll pretend this is a project named "MyLibrary" in a solution of the same name:
- MyLibrary/
- MyLibrary.sln
- MyLibrary/
- MyLibrary.csproj
# Settings in .csproj
We'll need to add some settings in the project file itself. You can open it in a regular text editor or can get to it two different ways in Visual Studio:
1. With the solution open, you can switch your Solution Explorer window to folder view to get easy access to all the raw files within the solution folder.
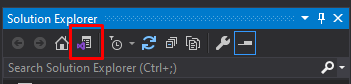
Then simply navigate down to the .csproj file and double-click it to edit it.
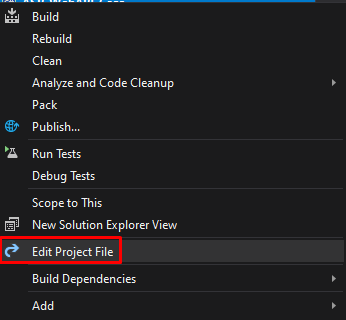
2. In the default view of the Solution Explorer, right-click the project and select "Edit Project File".
Once the .csproj file is open, you should see an XML document. Depending on the complexity of your project, it may have just a few lines or a lot.
The first settings we can add will be metadata for packaging our project into a NuGet package. Find the <PropertyGroup> section, which should already have a few lines inside it. Then add the following lines:
<PropertyGroup>
    ...
	<!-- A description for the NuGet package -->
	<PackageDescription>Some description.</PackageDescription>

	<!-- The URL where the code is stored -->
	<RepositoryUrl>https://github.com/MyOrg/MyLibrary</RepositoryUrl>

	<!-- The URL where the NuGet package should be uploaded -->
	<PackageProjectUrl>https://github.com/MyOrg/MyLibrary</PackageProjectUrl>

	<!-- Use the type "git" for GitHub repositories -->
	<RepositoryType>git</RepositoryType>

	<!-- This setting disables automatically creating a NuGet package locally after each successful build.
         We can turn this off since we want GitHub Actions to manage our repo packages -->
	<GeneratePackageOnBuild>false</GeneratePackageOnBuild>

	<!-- Authorship metadata -->
	<Company>My Org</Company>
	<Authors>My Authors</Authors>
</PropertyGroup>
These settings are the minimum we need to start packing and publishing the NuGet package. However, one thing to know is that GitHub Packages require that each upload have a unique version number.
# Versioning
There are many different ways to manage versioning and some other guides demonstrate how to automatically match the NuGet version to your git refs or tags. For my purposes at work, we use Visual Studio's auto-versioning feature, so I'll show you how to match the NuGet version to that.
If you don't already know, project files can follow two different versioning schemes:
- major.minor.patch
- major.minor.build.revision
You can set all of these fields manually but you can also let Visual Studio set some automatically, each time you build the project. Specifically, if you use something like 1.0.* or 1.0.*.*, then the build field will get set to the number of days since 2000/01/01 and the revision field will get set to the number of seconds since midnight divided by 2. The resultant version number would look like 1.0.7954.13030

Assembly version within the .csproj properties window. You can get here by right-clicking the project file in the Solution Explorer's default view, then going to the Package tabIf you set the version to 1.0.0.* then only the revision field will be automatically set, following the same rule as above. This means that builds on different days could appear out of order, since only the time since midnight is used and not the full date. For that reason, I highly recommend that you let both the build and revision field be automatic, if you want to use automatic versioning at all.
<PropertGroup>
    ...
	<AssemblyVersion>1.0.*</AssemblyVersion>
	<Deterministic>false</Deterministic>
</PropertyGroup>
You can set the version through the project's properties window or directly in the .csproj file. There are two things to be aware of:
- There's both an
AssemblyVersionsetting and anAssemblyFileVersionsetting. If you set one, you shouldn't set the other. For our purposes,AssemblyVersionworks fine. - In recent versions of Visual Studio, automatic version numbering is incompatible with "deterministic" builds. Deterministic builds try to create the same byte-for-byte code between builds but it isn't necessary for most cases. You'll need to turn if off in the .csproj file or you'll get a build error.
With that put into the .csproj file, each build will come out with a unique version number. You can still set the major and minor fields manually, as needed.
We still need to make the NuGet packaging process use our build version. As it is, all pack commands will spit out a NuGet package with the version 1.0.0 by default.
Back in the .csproj file, we need to add a new line to our PropertyGroup section and add a whole new section:
<PropertyGroup>
    ...
       <GenerateNuspecDependsOn>$(GenerateNuspecDependsOn);ReadPackageVersionFromOutputAssembly</GenerateNuspecDependsOn>
</PropertyGroup>
<Target Name="ReadPackageVersionFromOutputAssembly" DependsOnTargets="Build">
    <GetAssemblyIdentity AssemblyFiles="$(TargetPath)">
        <Output TaskParameter="Assemblies" ItemName="PackAssembly" />
    </GetAssemblyIdentity>
    <PropertyGroup>
        <PackageVersion>%(PackAssembly.Version)</PackageVersion>
    </PropertyGroup>
</Target>
What this does is tell the pack command that we want to run the command named "ReadPackageVersionFromOutputAssembly" before generating the NuGet package. We defined that command as setting the PackageVersion property to our project's build version.
Now the NuGet package's version will exactly match our project's version and we can automatically publish any build we want to GitHub without manually changing the version each time.
# Test build
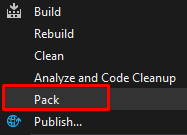
We have everything we need to create the NuGet package locally. Let's go ahead and do a manual test build to make sure everything is working.
From the default view of your Solution Explorer, you can right-click the project and select Pack.
Alternatively, you can run the dotnet pack command in the terminal window. You can open that window by clicking View and Terminal from the toolbar at the top of Visual Studio or simply by opening a new console/powershell/etc window in your solution's folder.
You should see a success message like Successfully created package '...\MyOrg\MyLibrary\bin\Debug\MyLibrary.1.0.7954.29476.nupkg'.
# Creating the GitHub Actions workflow
At this point, we can create a NuGet version of our library locally, with automatic version numbers. The next step is to get our GitHub repository to automatically package and publish the NuGet package whenever we push to our main branch.
# Generating a Personal Access Token
Before anything else, we need a way to authenticate against our GitHub repository. This is especially true since the goal of this guide is to have private packages and private repositories. There are different ways to accomplish this but I believe the overall best is to use a Personal Access Token (PAT).
PATs are like really specific passwords that you can generate with different permissions and lifetimes. This allows you to authenticate software under your account without using your real password and without exposing more permissions than it needs. In our case we'll need two PATs:
- A read-write PAT that can actually publish our NuGet package to our GitHub Packages page. Only one team member needs to make this and the token will be stored as a GitHub secret.
- A read-only PAT that can pull our published NuGet package into our various client applications. Every team member will need to generate one of these.
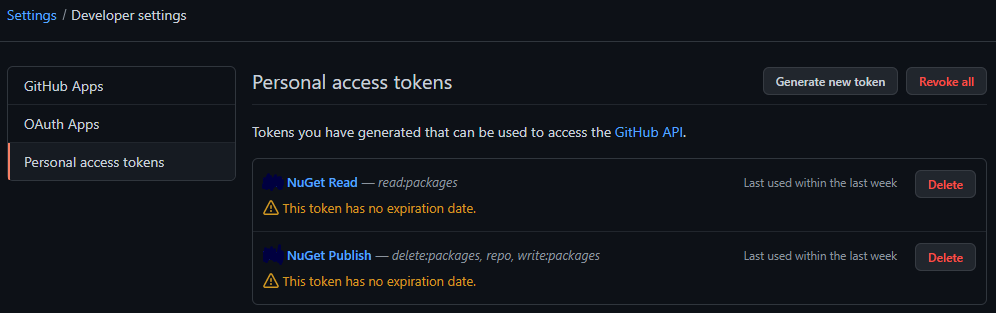
Both PATs can be generated in the same spot. Log into your GitHub account and navigate to https://github.com/settings/tokens. You can also get there by going to your account's Settings > Developer Settings > Personal Access Tokens. GitHub seems to change where this page is located from time to time, so don't be surprised if you have to search for it somewhere else.
Click Generate new token
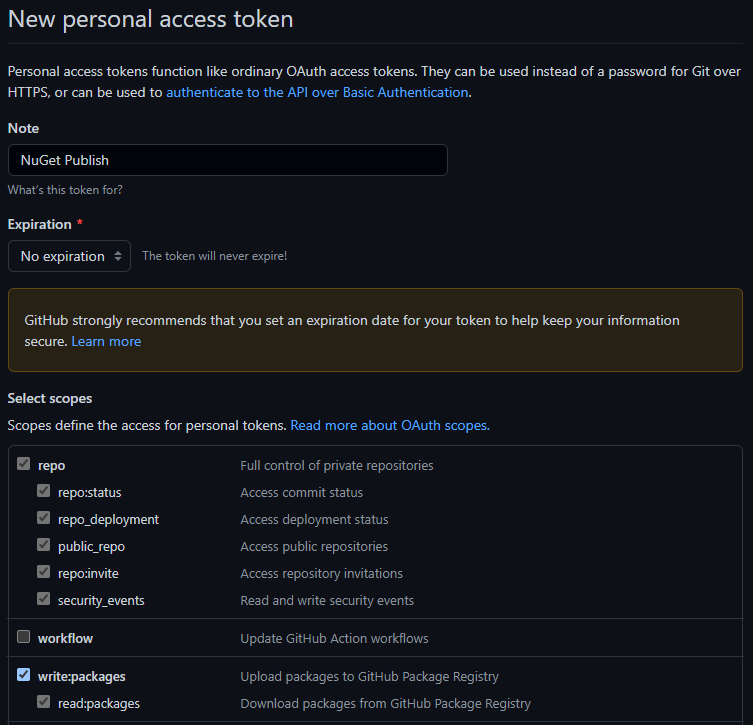
You can set whatever name you want for the token in the Note field. I'll use "NuGet Publish" so I know what this token is used for.
Set the Expiration to "No expiration", unless you know you want the token to automatically expire sometime in the future. This is a security setting that may be up to your organization's policies.
Make sure both write:packages and read:packages are checked. This may automatically check all the repo scopes, as well. This will allow our token to actually publish the NuGet package to our GitHub Packages page.
Scroll to the bottom and click Generate Token. This will show you the token that was just generated, which will look like a long string of letters and numbers. You must copy this token somewhere, like a file, to save it. Once you close this page, you can never see the token again, only generate a new one.
Only one person on your team needs to create this read-write token. Every team member will need to generate a read token, following the same steps as above, but only checking the read:packages scopes and naming it something like "NuGet Read".
# Adding the token to the repository secrets
Once we push a code change into our main branch, GitHub's servers will need to be able to publish our NuGet package to our Packages page. We could put our username+password or our read-write PAT directly in our configuration files and store them in the repository. But that'd mean giving anyone with access to our code our password or PAT. If you ever made your repository public in the future, this means anyone on the internet could get write-access to your Packages page.
Instead, GitHub lets us store private values in "Secrets" that only GitHub's own servers can access. If you go to https://github.com/MyOrg/MyLibrary/settings/secrets/actions or MyLibrary > Settings > Secrets > Actions, you can add our read-write PAT to the repository.
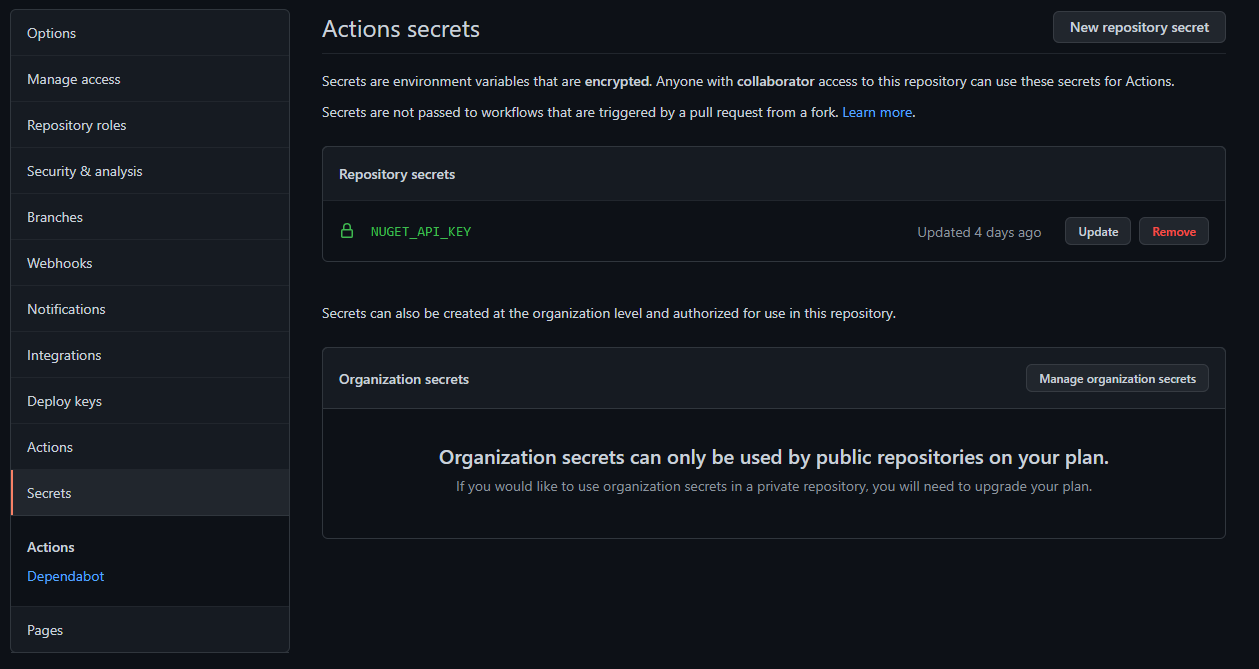
Click New repository secret, paste your read-write PAT into the value field, and give it a short name, like "NUGET_TOKEN". Click Add secret to save it.
# Creating the .yml file
GitHub Actions are defined by YAML files in the repository itself. There's a special folder structure for GitHub to find these files, so we'll have to make two folders and a YAML file in our solution folder:
- .github/
- workflows/
- Publish NuGet.yml
- workflows/
Publish NuGet.yml
name: CI

# Controls when the workflow will run
on:
  # Triggers the workflow on push or pull request events but only for the master branch
  push:
    branches: [ master ]
  pull_request:
    branches: [ master ]

  # Allows you to run this workflow manually from the Actions tab
  workflow_dispatch:

# A workflow run is made up of one or more jobs that can run sequentially or in parallel
jobs:
  # This workflow contains a single job called "build"
  build:

    env:
      BUILD_CONFIG: 'Release'
      SOLUTION: 'MyLibrary.sln'

    # The type of runner that the job will run on
    runs-on: ubuntu-latest

    # Steps represent a sequence of tasks that will be executed as part of the job
    steps:
      # Checks-out your repository under $GITHUB_WORKSPACE, so your job can access it
      - uses: actions/checkout@v2

      - name: Setup NuGet
        uses: NuGet/[email protected]

      - name: Restore dependencies
        run: nuget restore $SOLUTION

      - name: Setup .NET
        uses: actions/setup-dotnet@v1
        with:
          dotnet-version: 5.x

      - name: Build
        run: dotnet build $SOLUTION --configuration $BUILD_CONFIG --no-restore

      - name: Run tests
        run: dotnet test /p:Configuration=$BUILD_CONFIG --no-restore --no-build --verbosity normal

      - name: Pack
        run: dotnet pack --configuration $BUILD_CONFIG

      - name: Publish
        run: nuget push **\*.nupkg -Source 'https://nuget.pkg.github.com/MyOrg/index.json' -ApiKey ${{secrets.NUGET_TOKEN}}
This defines a series of scripts we want GitHub to run whenever we push a change to our main branch. In this case, the branch we're watching is called master, so be sure to replace that with the name(s) of whatever branch(es) you want releases to be based off of.
Similarly, You'll need to replace MyOrg with your actual repository owner, MyLibrary.sln with the actual name of your .sln file, and Release with the actual name of you production configuration (it's Release by default). If you're not using .NET 5, replace the dotnet-version field as appropriate.
All but the last two steps in this job are fairly standard for any .NET-based GitHub Action. They just checkout, restore, build, and test the project. The next step runs dotnet pack to create the NuGet package. The last step runs nuget push to publish the NuGet package to our Packages page, using the read-write PAT we saved as a Secret in the previous section.
# Real build
At this point, we should be ready to do a real build and publish of our NuGet package using GitHub's servers. You'll need to push or PR a commit into the main branch. The new YAML file defining the Action would be a good candidate to push all the way through your repository's branches.
Once you push the commit, you can navigate to the Actions tab of your repository in GitHub to view the workflow status. It may take a few seconds for it to appear after the push. Clicking into it and then clicking into the Build job inside it will show you a live output of each step.
If the job is successful, it should change from a yellow dot to a green checkmark for the job and action. You can navigate to https://github.com/orgs/MyOrg/packages to check for the NuGet package. It may take several minutes for the webpage to show it.
# Referencing the NuGet package in another project
If you made it this far, the hard part is over. There are a couple ways to actually get your NuGet package into a client application, but we'll go over how to add your GitHub Packages page as a real NuGet source in Visual Studio. This will let you install, update, and remove your private packages in exactly the same way as you would a public package from nuget.org.
# Adding the GitHub organization as a NuGet source
Each team member will need to use their read-only PAT to add the organization GitHub as a NuGet source. They'll only need to do this once per Visual Studio installation, but they'll have to repeat this single step if they ever install a new version of Visual Studio (eg. 2017 -> 2019 or Professional -> Enterprise).
Within a console/powershell/etc, run the following command:
dotnet nuget add source --username "USERNAME" --password "TOKEN" --store-password-in-clear-text --name github "https://nuget.pkg.github.com/MyOrg/index.json"
Replace USERNAME with your GitHub username, TOKEN with your read-only PAT, and MyOrg with your repository's real owner.
If you make a mistake, you can remove the new source by running:
dotnet nuget remove source github
You can change github to whatever name you want. This is the name that will appear in the NuGet Package Manager GUI or that will need to be used in various CLI commands.
Restart Visual Studio for it to recognize the new source.
# Installing the private package
From within Visual Studio, you can go to Tools > NuGet Package Manger > Manage NuGet Packages for Solution to get to the NuGet GUI. Once there, select github from the Package source dropdown:

Make sure you're on the Browse tab and you should see your private NuGet package there, ready to install into your client app.
# Updating the package
Updating the library project just involves you following your normal policies. Set the major and minor versions, if needed, then push the commit through to your main branch. GitHub will automatically create a new NuGet package version.
Then you can go into any of your client apps and update the dependency using the CLI or NuGet GUI.
# Storage management
One item of note is that GitHub offers specific amounts of Packages storage for each tier of subscription. The free tier currently gets 500 MB. You can check your .nupkg files in your project's bin folder to get an idea of how much space they'll take but it will likely be on the order of tens of KB.
You can manually delete old versions of packages through the GitHub website or API, to save space. You may wish to investigate using a script like https://github.com/smartsquaregmbh/delete-old-packages to automate this pruning process. It can be added as a step to your Publish NuGet.yml Action and set to keep a certain number of versions or to delete specific versions.
Just be aware that deleting old versions of your NuGet package will break any client applications that reference that specific version for anyone checking them out from GitHub for the first time. The reference will have to be changed to a version that still exists on GitHub, introducing the possibility for breaking changes.